How to Install a Door
Installing a door used to be a very challenging project,
attempted by only the most talented carpenters. The pre-hung door has
leveled the playing field. The door slab is already mounted on hinges,
the jamb is cut and sized, the casing is installed and in most cases the
doorknob hole has already been drilled. Essentially, somebody else has
already done a good bit of the door installation for you.
If you follow these steps, a homeowner who's good with a level and
hammer (or even better, a nail gun) can install a new door in less time
than you'd think.
Time: Around 2 hours for someone who hasn't done this before
Skill level: Moderate
Cost: A pre-hung hollow core door costs about $65 at a big-box store.
Time: Around 2 hours for someone who hasn't done this before
Skill level: Moderate
Cost: A pre-hung hollow core door costs about $65 at a big-box store.
by Clark Harris
by Clark Harris
Of course, you'll need a pre-hung door from the lumberyard. Big-box stores sell all the standard sizes.
|
by Clark Harris
by Clark Harris
|
|
Materials:
|
|
by Clark Harris
by Clark Harris
|
|
Doors come in standard sizes,
usually measured in inches: 24, 28, 30 and so on. Many lumberyards label
them by both feet and inches.
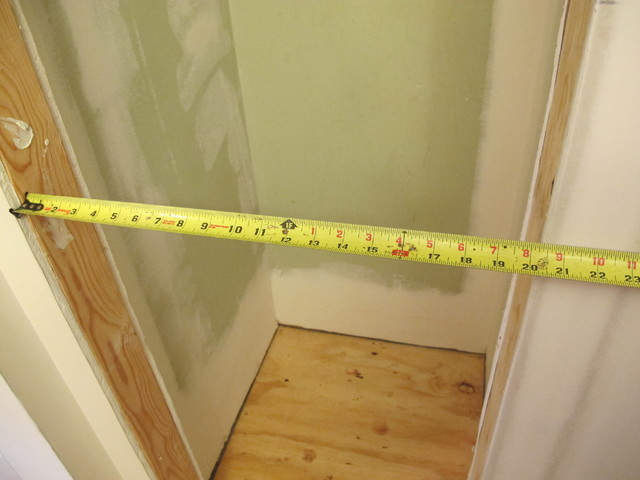
The standard rough opening height is 83 inches from the subfloor to the top of the opening. The rough or framed opening should be two inches wider than the door slab. This allows for the jambs (the wood on either side of the door), plus wiggle room to get the door level and plumb. In this case, the rough opening measures 20 inches, so we'll use a small, 18-inch door. Note: Doors come in right-hand (RH) and left-hand (LH) models. The easiest way to determine which door you need is to face the door on the hinge side. If you would normally reach out with your right hand to open it, you have a right-hand door. If you would reach with your left hand, you have a left-hand door. |
by Clark Harris
by Clark Harris
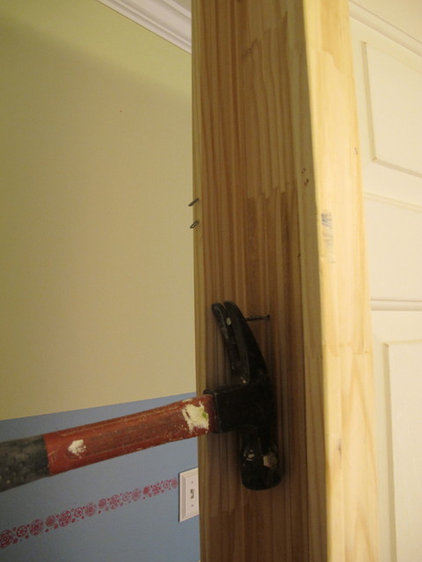
Use your hammer to gently knock
off these blocks. You can also twist these off with your hands or use
the claw of the hammer. Remove any remaining staples with pliers.
by Clark Harris
by Clark Harris
Pull out the nails between the
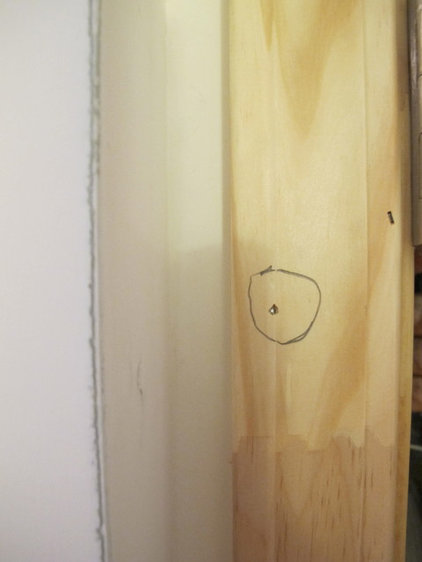
jambs that are holding the door together for transport. I've mistakenly
nailed up a door with this nail still in place. Doing this won't make
you feel very good about yourself, to say the least.
You'll also want to remove the staples that hold the front and back jamb together.
You'll also want to remove the staples that hold the front and back jamb together.
by Clark Harris
by Clark Harris
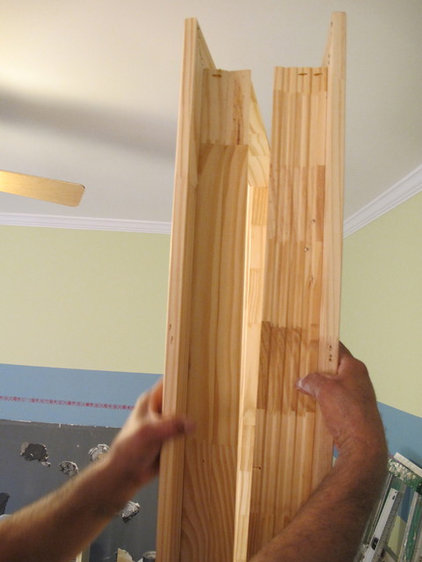
Pull the rear section away from the front section of the door.
I love this. Whoever invented the pre-hung door is a true genius in my book.
I love this. Whoever invented the pre-hung door is a true genius in my book.
|
by Clark Harris
by Clark Harris
|
|
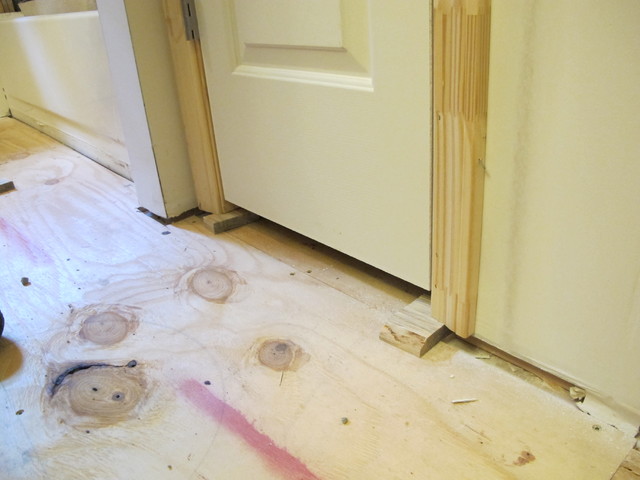
Place the door on blocks. This
particular home will have a tile floor, so we have the door on 3/4-inch
blocks. For a hardwood floor, also use a 3/4-inch block (or be nice and
put in the door after your hardwood guy installs the floor). For
carpet, use a 3/8-inch or 1/2-inch block. If you have really thin
carpet, you may want to go lower. For a vinyl floor, just place the
door on the subfloor.
|
by Clark Harris
by Clark Harris
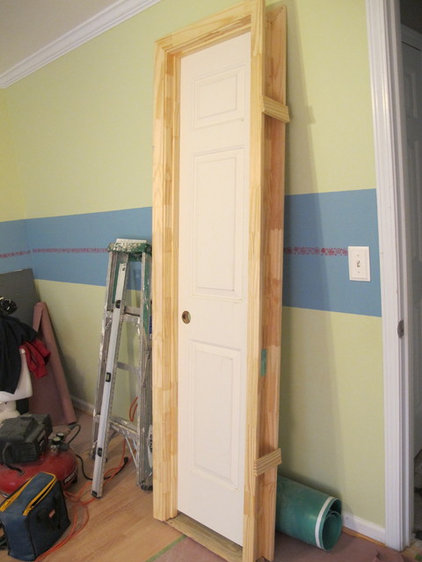
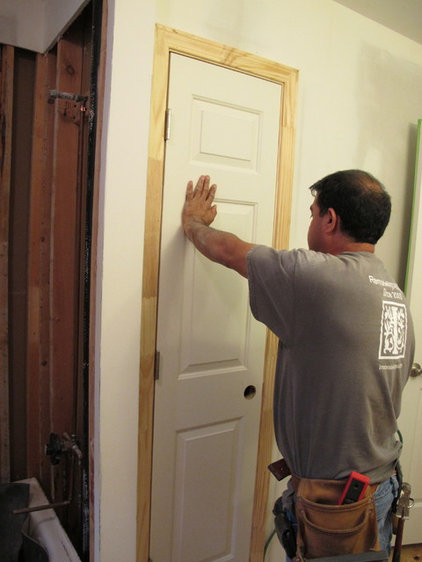
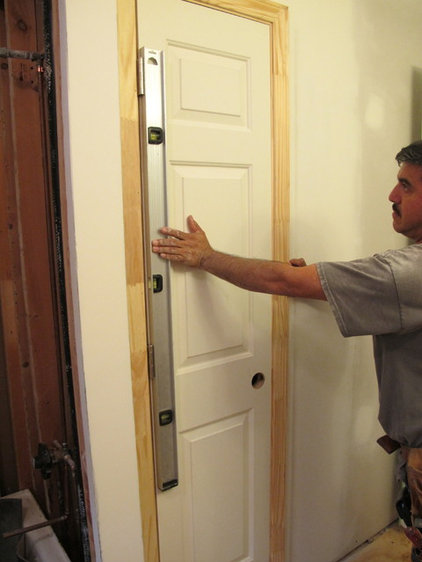
Hold the door in the opening.
Ideally you want the doorknob on the same side as a light switch, so that when you open the door it's easy to turn on the lights. It's also nice to have a door open into a wall, so it can rest against the wall when it's open. Try coordinating your door in one of these ways. The side with the hinges showing will be the front side.
Ideally you want the doorknob on the same side as a light switch, so that when you open the door it's easy to turn on the lights. It's also nice to have a door open into a wall, so it can rest against the wall when it's open. Try coordinating your door in one of these ways. The side with the hinges showing will be the front side.
by Clark Harris
by Clark Harris
Hold a level against the hinges to make sure the door is plumb (level in the vertical position).
by Clark Harris
by Clark Harris
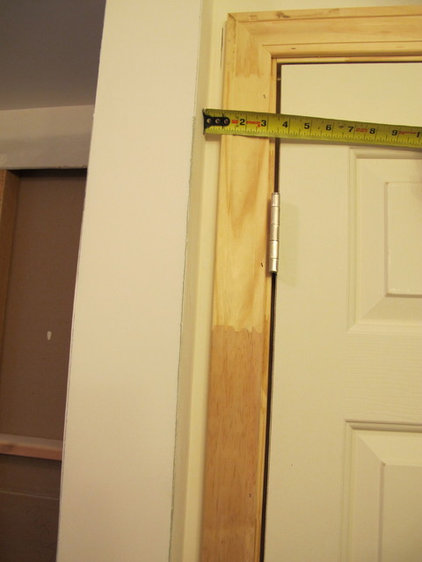
Measure the distance from the
door to the closest wall at the top and bottom of the door. In my
opinion, it is more important that these distances are equal than to
have the door completely plumb. Your eye will compare how the door
looks in relation to the wall.
If the wall itself is really out of plumb, I try to split the difference between the door being plumb and matching the distance off the wall at the top and bottom.
If the wall itself is really out of plumb, I try to split the difference between the door being plumb and matching the distance off the wall at the top and bottom.
|
by Clark Harris
by Clark Harris
|
|
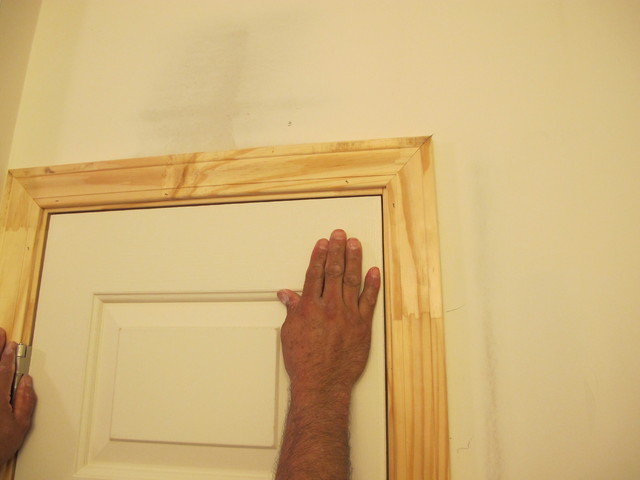
The gap between the jamb and the door must be consistent across the top. The same goes for the gap down the side.
Contractor's tip: You can cheat this gap by slightly altering the height of either side of the door. Lift one side higher off the blocks on the floor or remove a block and cheat the door down a bit. You can also push the top of the door assembly to the left and right to adjust the gap. Note: You will take the door out of plumb by doing this, so please check after altering the door to make sure it is close to plumb. Like all things in life, this only works in moderation. |
by Clark Harris
by Clark Harris
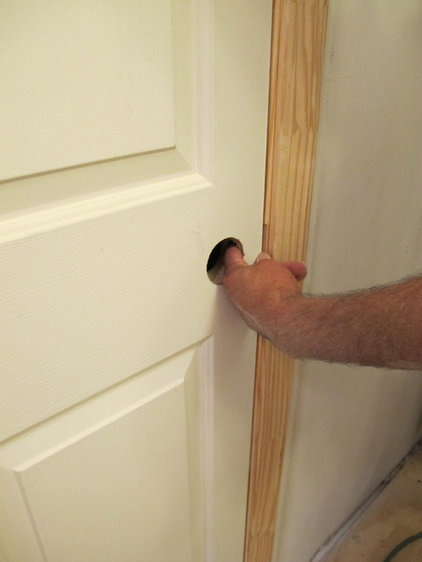
I like to stick my finger through
the space for the door knob and make sure the door lines up with the
hole drilled in the jamb. This way you're sure the doorknob striker
lines up with the strike plate.

by Clark Harris
by Clark Harris
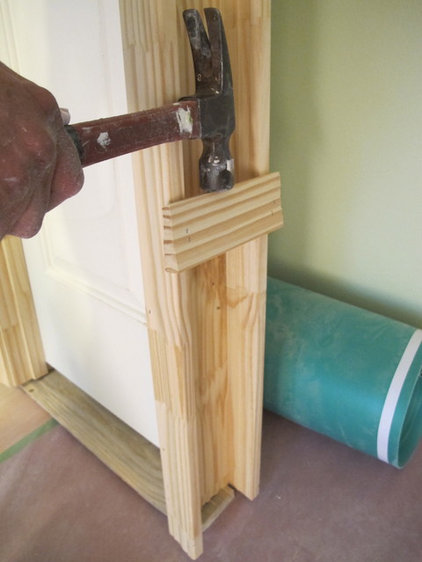
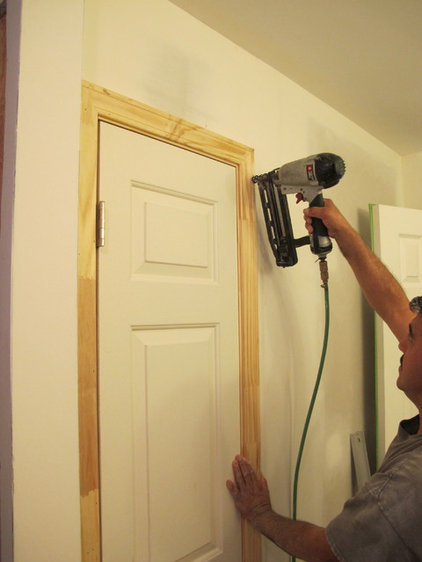
Shoot or hammer a nail into the
top hinged side of the door casing. Work your way down the door,
equally spacing about four or five nails. I start at about the height
of the top hinge and stop around the bottom hinge.
Check the following before nailing:
1. The door is plumb.
2. The distance from door casing to the nearest wall is consistent.
3. The door has a consistent gap at the top and down the doorknob side.
4. Check that the doorknob hole and the hole in the jamb line up.
Check the following before nailing:
1. The door is plumb.
2. The distance from door casing to the nearest wall is consistent.
3. The door has a consistent gap at the top and down the doorknob side.
4. Check that the doorknob hole and the hole in the jamb line up.
by Clark Harris
by Clark Harris
I like to use the nail gun to put
the nails close to the outside of the casing. In this case, there is a
line grooved into the casing about 3/4-inch from the outside. It
provides a nice target for the gun and accepts putty well, which will
conceal the nail holes later. These nails are very important because
they are the main anchors holding the door in place. If you do not hit
the solid framing lumber in the wall, the door will not stay in place.
The closer you get to the inside of the casing, the more likely you will
miss the framing lumber.
If you have not shot a nail gun before, you will not be able to "feel" that you missed the lumber. Take a second to peek around the back side of the door to confirm you have not missed. If you see your nails, move closer to the outside of the casing. You can also pull on the side you just shot to make sure it is anchored.
If you have not shot a nail gun before, you will not be able to "feel" that you missed the lumber. Take a second to peek around the back side of the door to confirm you have not missed. If you see your nails, move closer to the outside of the casing. You can also pull on the side you just shot to make sure it is anchored.
by Clark Harris
by Clark Harris
After nailing the hinge side,
shoot about five nails down the opposite side. Continue to check the
consistency of the gap down this side.
by Clark Harris
by Clark Harris
Get ready to set the rear jamb into place.
by Clark Harris
by Clark Harris
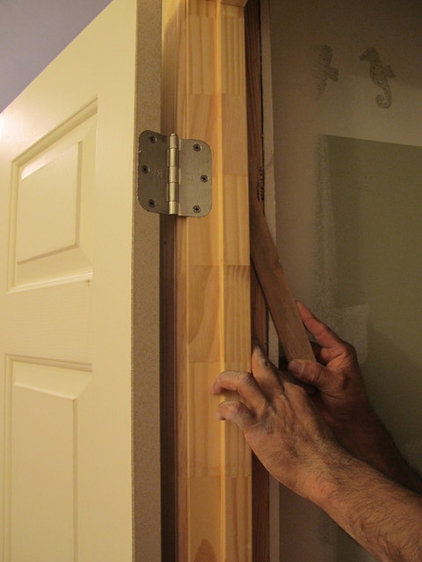
Now you'll want to add shims to
the door to fill any gaps. You can fill larger gaps by placing shims on
top of each other in opposite directions — fat end to skinny end — and
sliding them toward each other until the gap is filled.
Install the shims near the top and bottom on each side of the doorway. First, put the shims on the hinge side. The shims will fit between the jamb and the 2-by-4 framing. I like to place one set of shims just under the top hinge, and the other just above the bottom hinge. These will keep the door from expanding and contracting, and make the door system feel more solid when shutting the door.
Here, Mark Simon, lead carpenter on this project, used two full shims and slid the opposing ends together until they formed a tight fit. Install the shims just until they fit snugly in the jamb — do not force them in, or they may push the jamb outward.
by Clark Harris
by Clark Harris
Contractor's tip: I like
to cut shims into 3.5-inch pieces, stack a few together and push them
into the jamb. Then I'll shoot a nail through the jamb and the shims to
hold them in place.
by Clark Harris
by Clark Harris
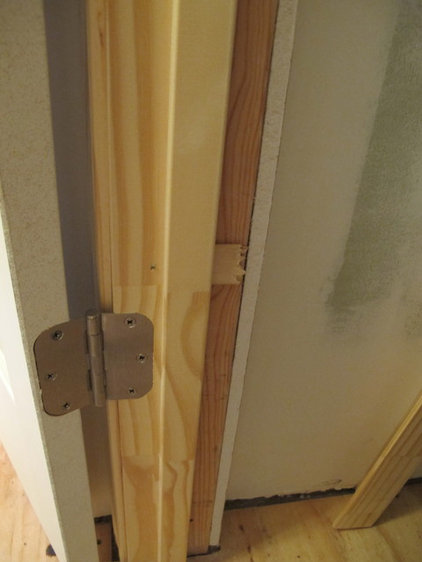
Slide the rear part of the jamb back into the slots.
Note: This door is made for 2-by-4-foot framing. If you are working in a basement, you may need to buy a door made for a 2-by-6 framed wall.
Note: This door is made for 2-by-4-foot framing. If you are working in a basement, you may need to buy a door made for a 2-by-6 framed wall.
by Clark Harris
by Clark Harris
Nail in the jamb the same way you did on the other side of the door.

by Clark Harris
by Clark Harris
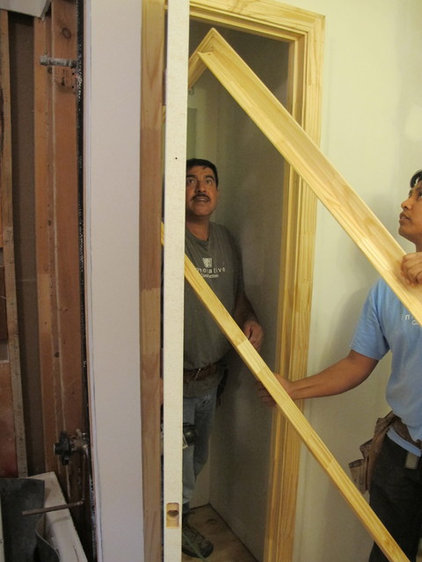
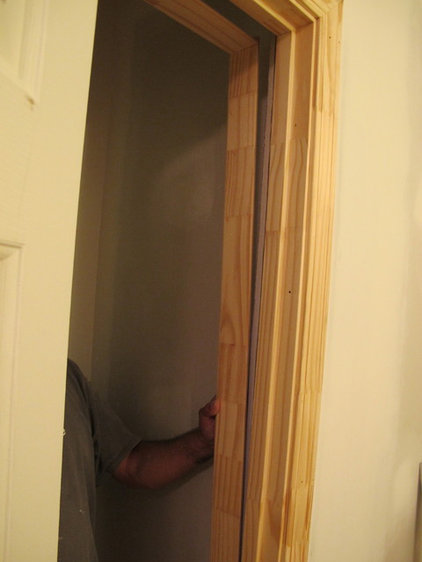
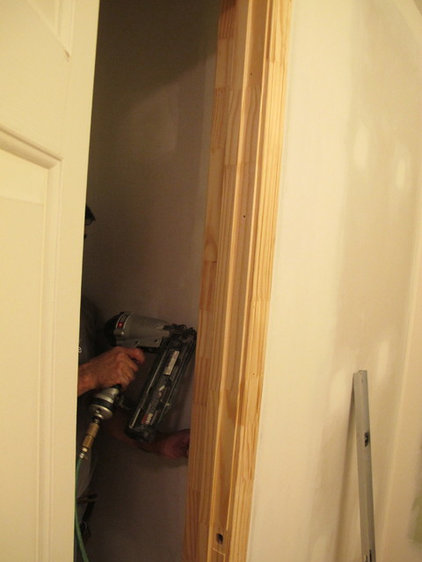
We will now lock the rear and
front jambs together. There's a tongue and groove between the two jambs
to keep them together. You'll need to secure that with a nail to make
the door assembly into one unit and keep it stable when the door opens
and closes.
Squeeze the jambs together with one hand and shoot a nail through the middle section. This can be a pretty tricky shot. If you are too close to the edge, it can split the jamb; if you are too far from the edge, you may not catch the rear jamb. I would recommend starting in the middle and working your way over until you feel it catch.
Be careful doing this with a nail gun, and keep your hand a safe distance from the gun. Yes, I learned this the hard way.
by Clark Harris
by Clark Harris